Kategorien
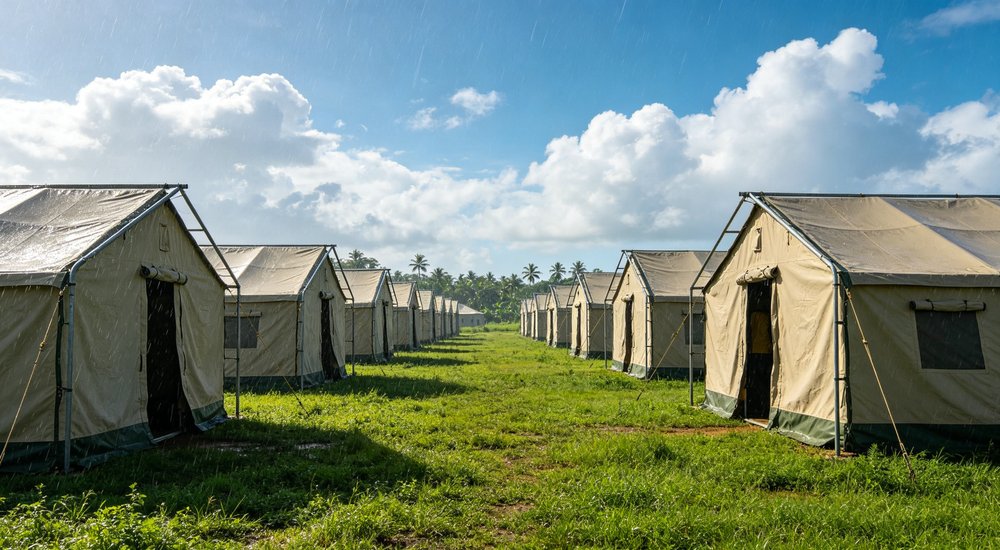
Hot weather and heavy rain create different emergency shelter problems, especially during rainy season deployment in humanitarian operations. A suitable frame relief tent, especially for wholesale disaster relief and refugee camp use, must balance cross-ventilation, protected openings, rain paths, ground drainage, condensation control, wind resistance, securing, and practical maintenance. This 12-point buyer guide helps procurement teams compare frame tent options from reliable relief tent suppliers and manufacturers for hot dry, rainy, and hot-humid climates by focusing on usable features rather than generic material labels.
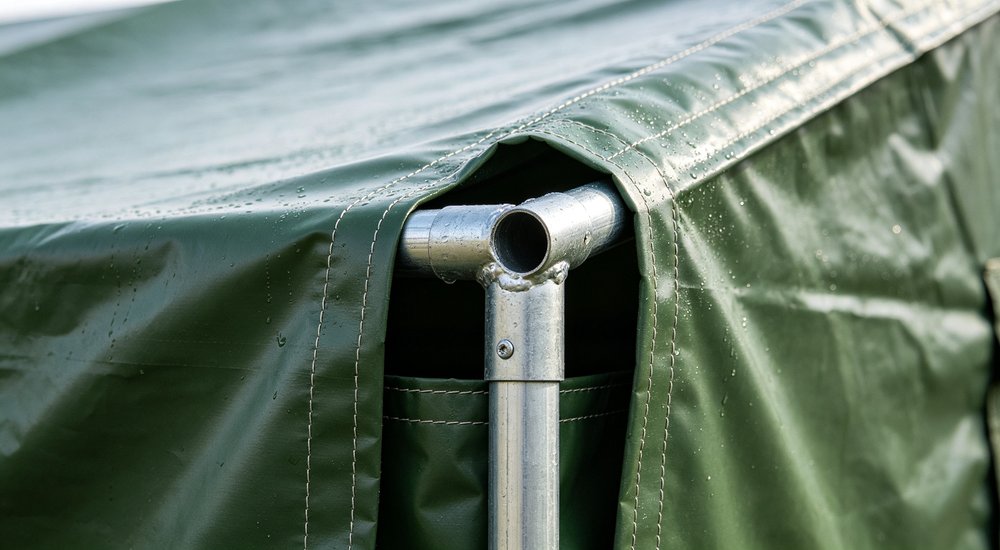
Tent frame structure and PVC fabric detail
Short answer: For heat, prioritize usable cross-ventilation, shade direction, occupancy, and safe airflow during operation. For rain, prioritize site drainage, roof and seam treatment, protected openings, lower-edge details, and drying after use. For hot and humid weather, neither ventilation nor waterproofing can be considered alone.
Table of Contents
1. Separate Heat, Rain, and Hot-Humid
2. Usable Airflow for Hot Weather
3. Manage Sun Exposure First
4. Follow the Full Water Path
5. Drainage Before Groundsheet
6. Waterproofing vs Condensation
7. Wind-Driven Rain and Securing
8. Cleaning and Drying Plan
9. Climate-Based Request List
10. Common Climate Selection Errors
11. Daytime Heat and Night Humidity
12. Doors, Windows, and Vents Balance
13. Shade Layers and Liners
14. Entrance Position and Floor Connections
15. Sample Check Open, Closed, Wet
Frequently Asked Questions
Related Products
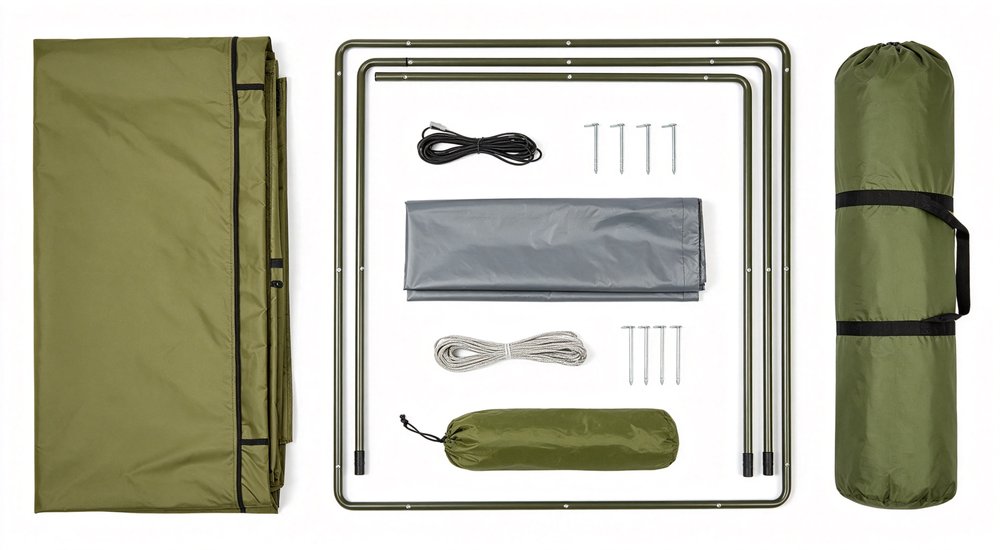
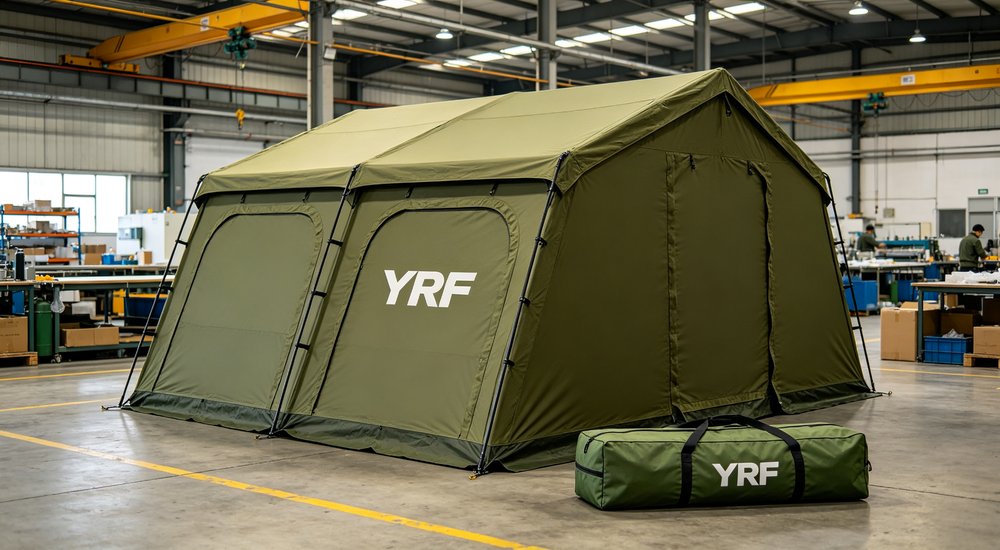
Complete frame relief tent set with all components
Key Takeaways:
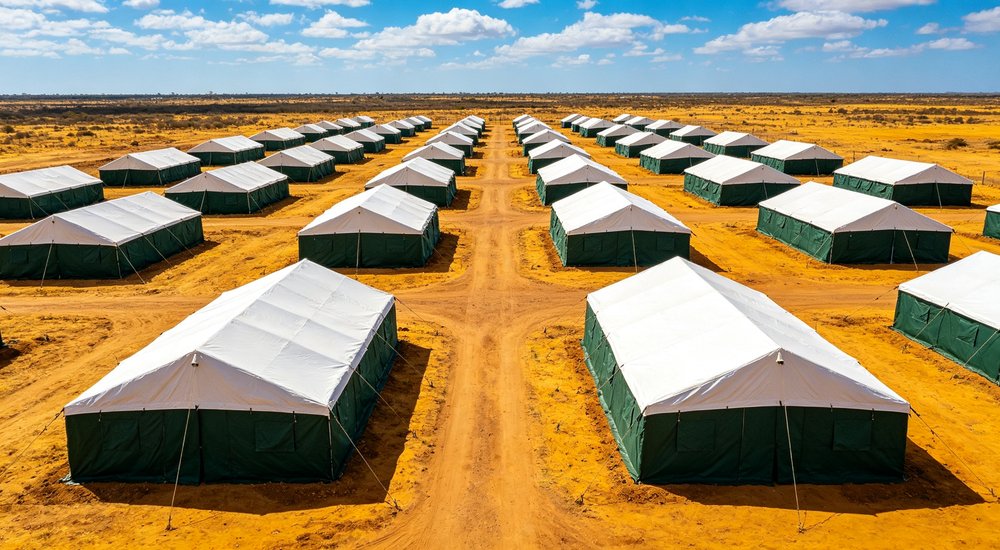
A hot dry site mainly needs airflow, shade planning, and control of solar heat. A rainy site needs runoff, protected openings, sealed joints, and suitable ground conditions. A hot-humid site needs both, while also managing moisture from occupants and wet items.
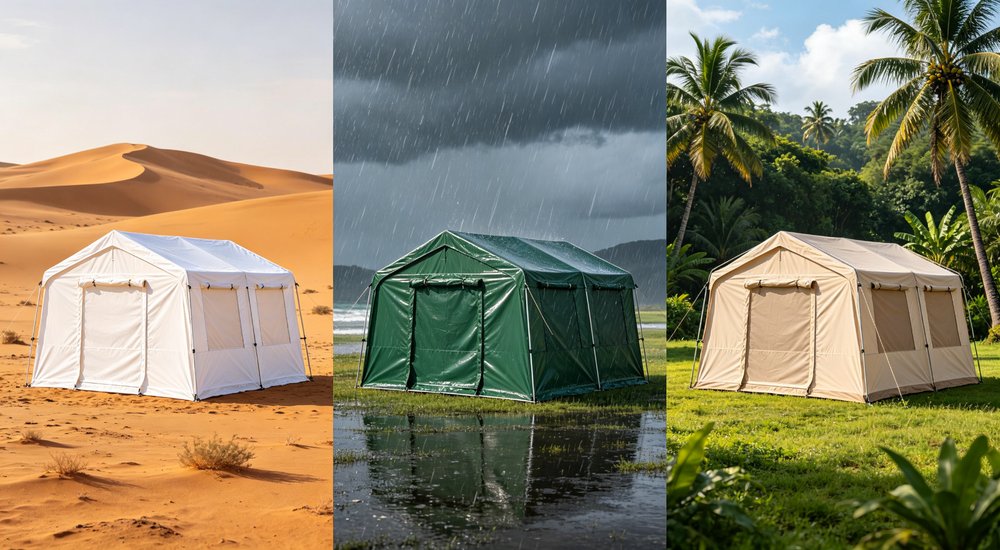
State daytime and night conditions separately. Add rainfall pattern, humidity, wind exposure, operating period, occupancy, and whether the tent remains fixed or moves often. A general phrase such as “tropical use” is too broad for a useful comparison.
Ask the supplier to explain which frame tent features address each condition. One feature should not be presented as the answer to every climate problem. A larger window may improve airflow, yet it still needs rain protection and practical closure.
Buyer result: Create 3 short lines in the project brief: heat task, rain task, and moisture task. This prevents a strongly waterproof cover from being selected without usable ventilation.
Rank the 3 tasks instead of treating them as equal slogans. A short daytime support tent may place airflow first. An overnight camp during seasonal storms may place protected ventilation and drainage first.
An emergency storage shelter for moisture-sensitive goods may place controlled openings and ground separation first. Ask the supplier to respond to that order and explain any compromise. The result should show which condition controls the design, which features support it, and which site actions remain with the buyer.
Separate conditions that occur every day from less frequent events with greater consequences. Continuous daytime heat affects normal ventilation and occupancy. A short period of heavy rain may test the roof, protected openings, and site drainage at the same time.
First make sure the tent remains practical during frequent use. Then check whether the product and site arrangement can manage the more serious weather event.
When these 3 requirements conflict, do not hide them under a broad label such as “tropical tent.” Separate fixed requirements from adjustable items. Also identify the conditions that depend on site preparation. This gives suppliers a clear basis for proposing comparable configurations instead of unrelated interpretations.
|
Climate Type |
Priority Openings |
Recommended Cover |
Securing Focus |
Key Risk |
|
Hot and dry |
Large doors, mesh windows, roof vents |
Light color PVC or PE, UV resistant |
Dust and wind exposure |
Heat buildup, UV fading |
|
Frequent rain |
Protected flaps, covered vents |
PVC coated polyester, heat-sealed seams |
Ground anchoring, wind load |
Leaking seams, site flooding |
|
Hot and humid |
Cross-ventilation + rain flaps + mesh |
Breathable liner + waterproof outer |
Mildew prevention, drying space |
Condensation, mildew |
|
Windy and rainy |
Reduced opening area, reinforced flaps |
Heavy PVC, reinforced corners |
Heavy stakes, guy lines, ballast |
Frame failure, cover tearing |
Ventilation depends on the number, size, height, and position of openings. Air needs an entry and exit path. One open door does not always create cross-ventilation, especially when partitions or densely placed beds block movement.
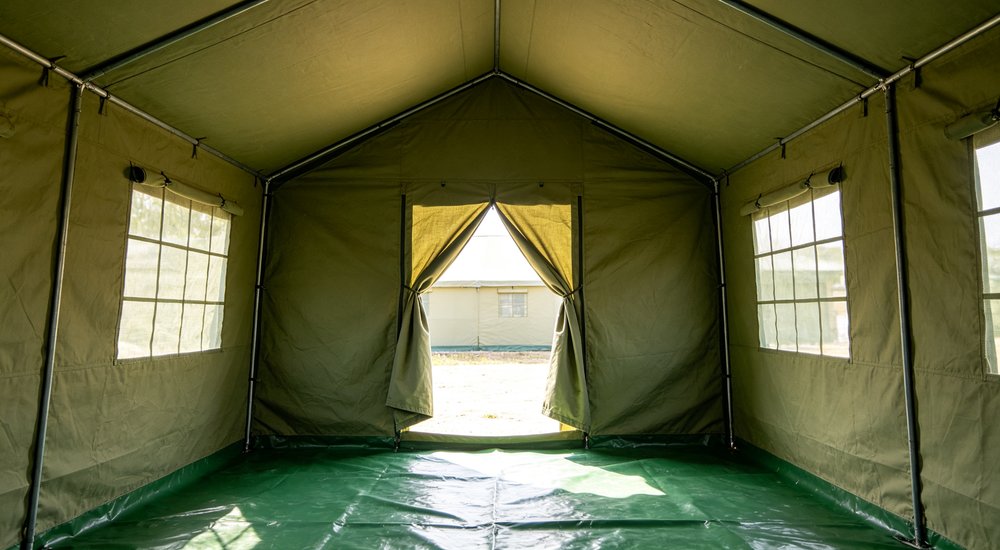
Share occupancy, bed or equipment layout, daytime use, privacy needs, and insect conditions. Check which windows, vents, mesh panels, and roll-up sections can remain open during normal use.
Mesh supports insect control while allowing airflow, but its density and protective flap affect the result. A liner or divider can also change the air path. Request a drawing that shows openings against the intended interior layout.
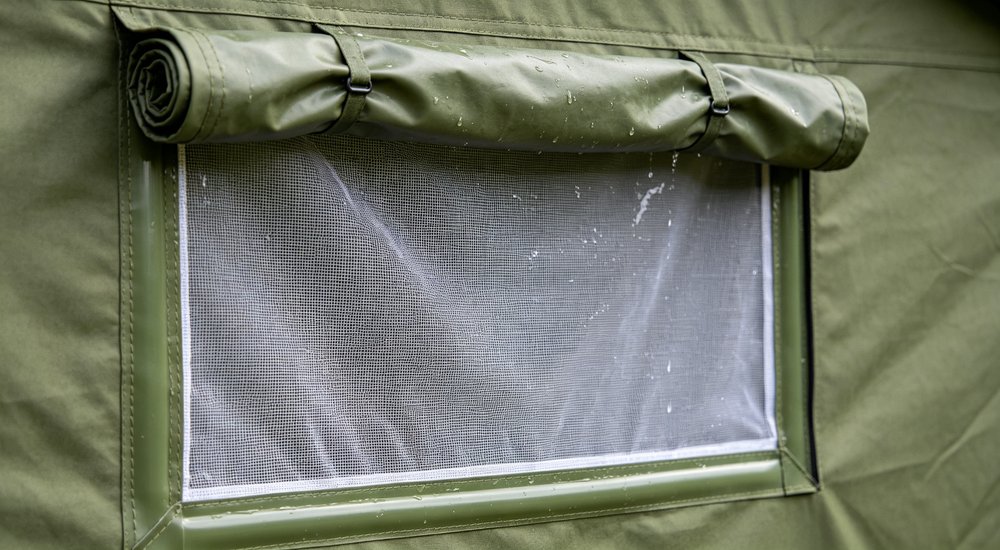
Ventilation does not guarantee a fixed indoor temperature. Shade, ground heat, wind, occupancy, and operating routines still matter. Avoid temperature promises unless they belong to the exact tested configuration and conditions.
Test the proposed airflow against the furniture plan. Mark beds, aisles, dividers, stored bags, and worktables. Then draw a simple path between lower and higher openings.
If the path crosses a closed partition or occupied sleeping position, the theoretical ventilation may not work in daily use. Ask whether flaps can be adjusted without removing insect mesh. This turns a list of windows into an operating decision that a camp team can understand and repeat.
Direct sun heats the roof and exposed walls. Site orientation, nearby shade, roof spacing, color, UV resistant coating, and liner direction can change how heat is experienced. Light-colored covers reflect more solar radiation, while darker colors absorb heat but may hide stains better in long-term field use.
UV protection depends on the coating quality and fabric density, not only the color. A UV resistant PVC or PE coating can slow color fading and coating degradation in strong sunlight. Ask for the UV treatment method and whether it applies to the quoted color, since some pigments degrade faster than others under continuous exposure.
Ask when the tent is occupied and which side receives the strongest afternoon sun. Position frame tent doors and large openings so they support airflow without creating uncontrolled rain entry or privacy problems.
A reflective or UV-resistant description should be tied to the quoted material. It should not become a universal promise about inside temperature or service life. The buyer still needs a shade and inspection plan.
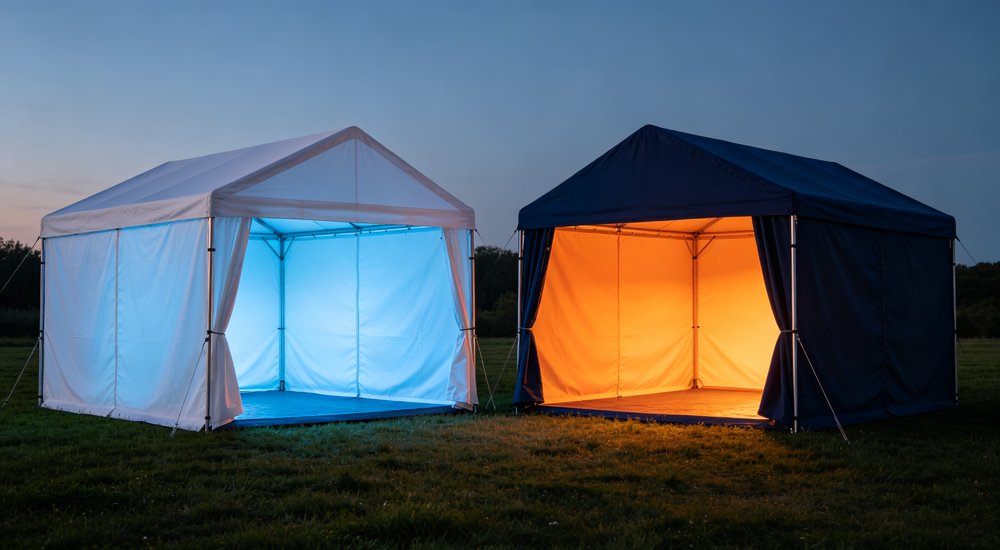
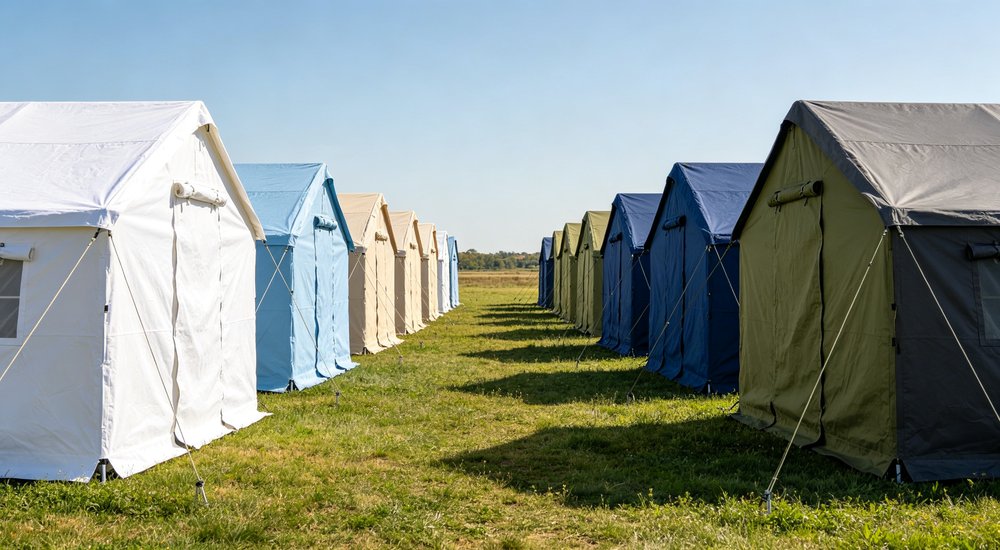
Tent color directly affects internal temperature. Light-colored tents (white, beige, light blue) reflect sunlight and stay cooler inside, but show dirt and aging more easily. Dark-colored tents (navy, olive, dark gray) absorb heat and may be 5-10°C warmer inside, but are more stain-resistant and discreet for low-profile settings.
For hot climates, white, beige, or light blue are recommended as the main color, with darker trim or base strips to reduce visual monotony. For rainy overcast climates, the heat absorption issue is less critical, and olive or navy may be more practical. Two-tone designs (light top, dark bottom) offer a compromise between heat reflection and stain resistance, making them ideal for hot and rainy regions.
Compare 2 complete arrangements rather than 2 fabric labels. One may use more protected ventilation and a liner. Another may use simpler walls with planned external shade. The better choice depends on occupancy, relocation, cleaning, and available site work.
|
Material |
Waterproof |
Breathable |
Weight |
Typical Life |
Best For |
|
PVC Coated Polyester |
Excellent |
Low |
Medium-High |
3-5 years |
Rainy, windy, long-term camps |
|
PE Woven Tarpaulin |
Good |
Low |
Light |
6-18 months |
Short-term emergency, low budget |
|
Polyester Oxford |
Medium (needs coating) |
Medium |
Light-Medium |
2-3 years |
Hot dry, moderate rain |
|
Cotton Canvas |
Low-Medium |
High |
Heavy |
2-4 years (with care) |
Dry climates, comfort priority |
External shade also needs spacing and securing. A loose sheet placed directly on the roof may trap water or load the tent in a way the configuration did not anticipate. Ask whether the proposed model supports a separate fly, roof layer, or planned shade structure.
Confirm the air gap, attachment points, runoff, and packing. Where no supported shade component exists, improve site choice and operating hours rather than improvising a load on the main cover.
Rain reaches more than the roof sheet. It moves across panel joints, corners, doors, windows, vents, lower edges, and any cover-to-floor connection.
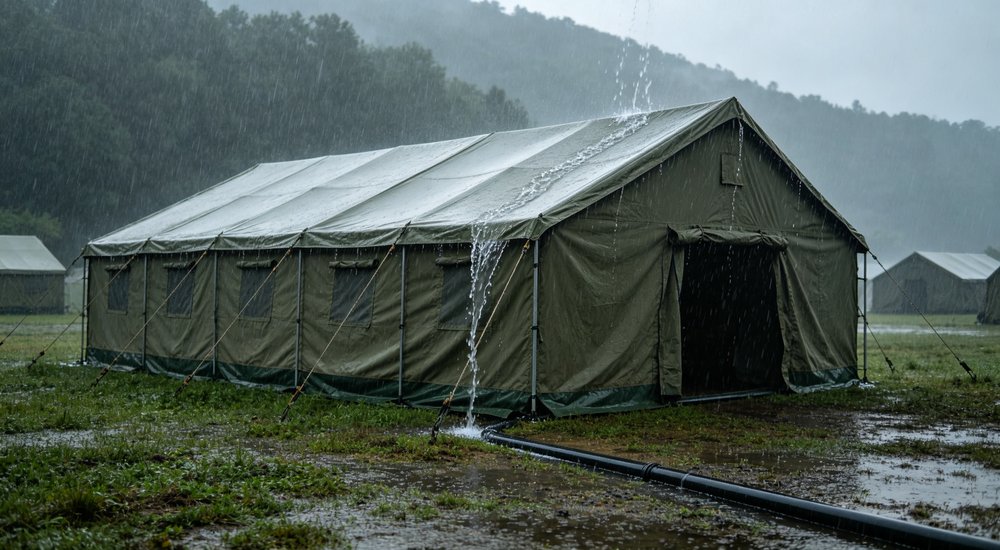
Ask how frame tent seams are welded, taped, heat-sealed, coated, or sealed. Heat-sealed seams generally provide better rain resistance than stitched seams because needle holes are eliminated. Confirm how flaps protect openings and how water leaves the roof without collecting above entrances. Also confirm whether the cover material includes flame retardant treatment, since disaster relief and humanitarian projects often require fire safety certification.
The supplier should distinguish fabric water resistance from completed-tent construction. A fabric value cannot describe site drainage, damaged seams, open doors, or standing water. For a detailed comparison of PVC, PE, Oxford, and canvas cover materials, see our tent tarpaulin material selection guide.
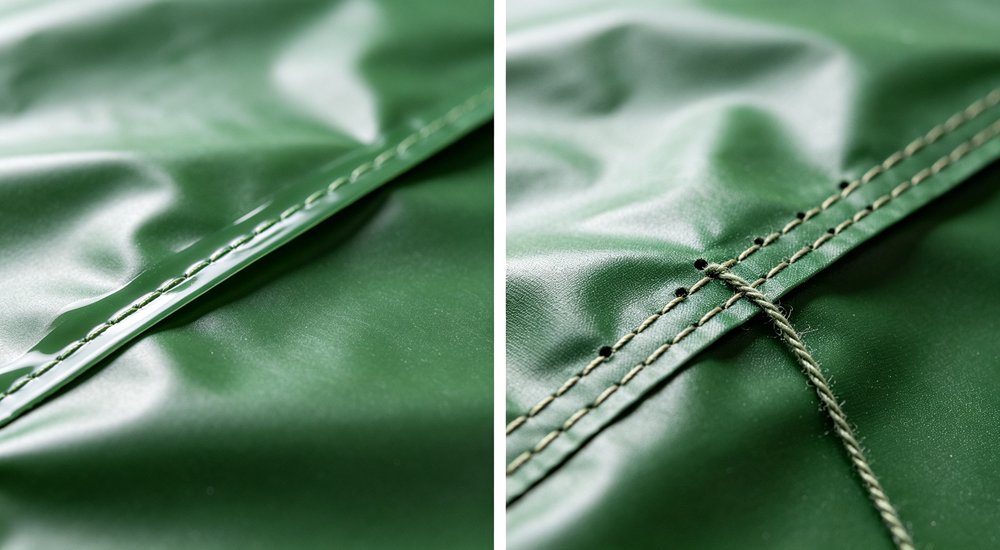
Use a sample or agreed inspection method to observe roof joints, opening flaps, lower edges, and visible leakage. Keep the result tied to the exact model and configuration.
Evaluate rainfall duration as well as intensity. A brief shower and several hours of wind-driven rain expose joints and lower edges differently. State whether doors must remain in use during rain and whether people carry wet items inside.
Determine where water drains when an entrance flap opens. This exposes practical risks around access, not only roof performance. The supplier can then show a more suitable opening direction or identify a limit that the site plan must manage.
Low ground, compacted depressions, blocked channels, and runoff from nearby surfaces can place water below or around a tent. A floor can separate the interior from limited surface moisture, but it cannot correct a poor site.
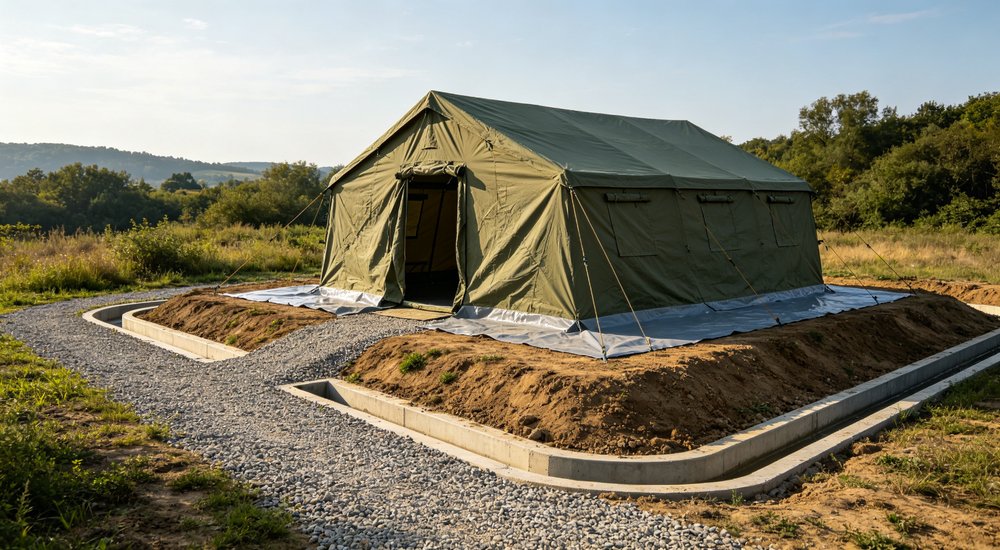
Note the slope, low points, soil condition, previous standing water, entrance position, and expected runoff. Keep water routes away from sleeping areas and access paths.
Verify how the lower cover, skirt, floor, and entrance work on the proposed ground. Then separate supplier scope from site preparation. This produces a usable arrangement instead of an isolated floor option.
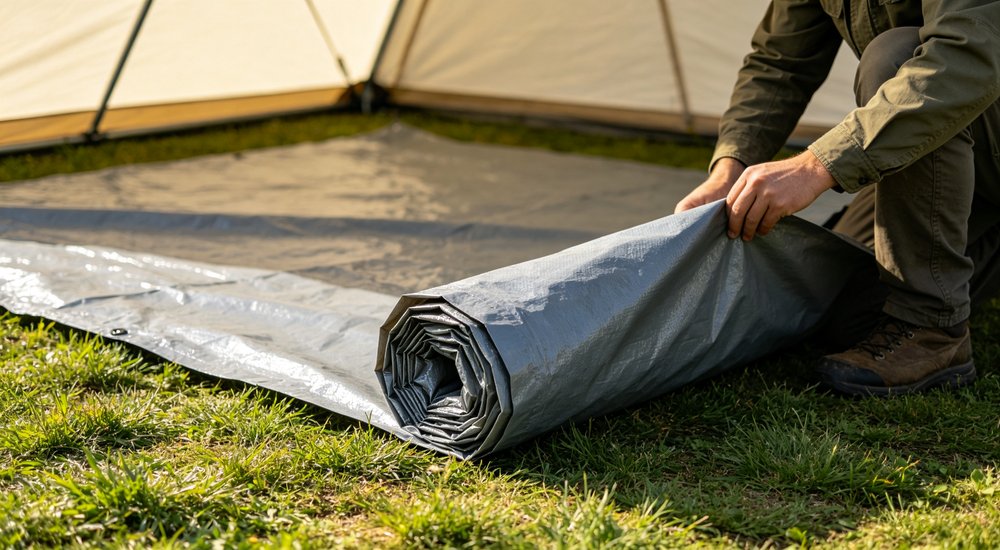
Review the site after rainfall when possible. Dry-weather photographs may hide shallow depressions, soft access routes, and water from nearby roofs or paved areas. Mark a clear route for surface water before marking tent positions.
If the ground cannot be changed, reduce exposure by moving the footprint rather than relying on higher floor edges. The final site note should identify preparation, drainage, entrance position, and any separate ground layer.
|
Condition |
First Selection Focus |
Common Mismatch |
|
Hot and dry |
Cross-ventilation, shade, occupancy, dust |
Adding weight without improving airflow |
|
Frequent rain |
Drainage, seams, protected openings, drying |
Relying on one fabric number |
|
Hot and humid |
Rain control plus ventilation and moisture routines |
Closing every opening for long periods |
Occupants release moisture through breathing. This is especially common in single layer tents where the inner wall is the same material as the outer waterproof layer. Double layer tents with a breathable inner liner reduce condensation because moisture can pass through the inner layer before reaching the cold outer surface. Wet clothing, damp bedding, cooking restrictions, and warm humid air can add more moisture. When that air reaches a cooler surface, condensation may appear inside.
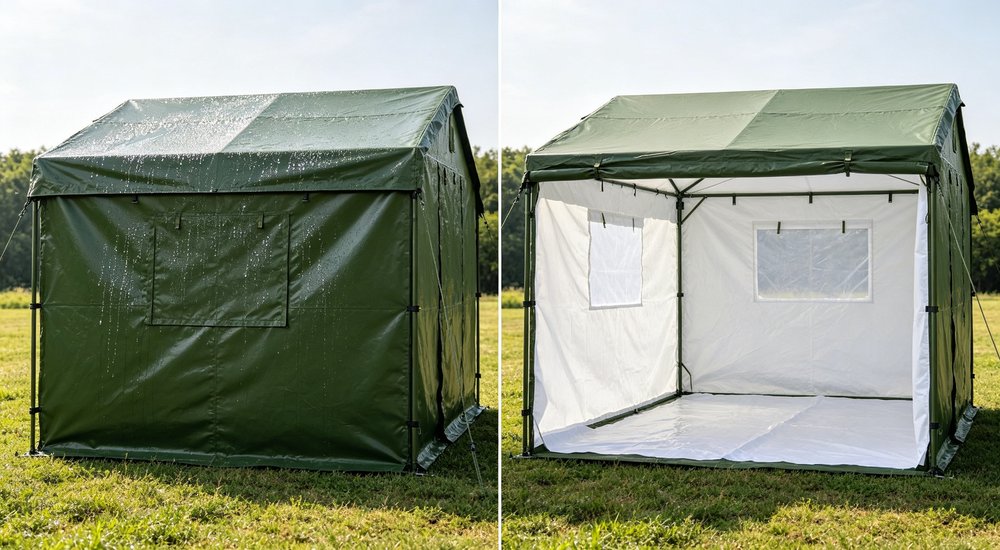
Ask how vents, mesh openings, doors, liners, and occupancy work together. A liner may reduce direct contact with the outer cover, but it adds cleaning, drying, packing, and installation tasks.
Define an operating routine for ventilation during rain. Identify which openings remain protected and how wet items leave the sleeping area. Material selection alone cannot replace those actions.

For storage use, state whether goods are moisture-sensitive and how often doors open. Storage moisture and overnight sleeping moisture require different decisions.
Heating, fans, or electrical equipment can change the moisture and safety plan. Do not assume they are included or suitable because the tent has vents. State the intended equipment, power source, clearance, and operating supervision.
Ask only for interfaces that belong to the quoted model. The responsible project team must confirm electrical and fire requirements. This keeps the tent article focused on selection while preventing ventilation advice from becoming an unsupported equipment promise.
Wind changes the direction of rain and can press water toward openings and seams. It also changes the load on the cover, frame, anchors, stakes, and guy lines. Wind resistance depends on frame strength, cover tension, anchoring method, and fabric tear resistance, not only the fabric weight. A heavier cover with poor anchoring can fail before a lighter cover with proper guy lines and stakes.
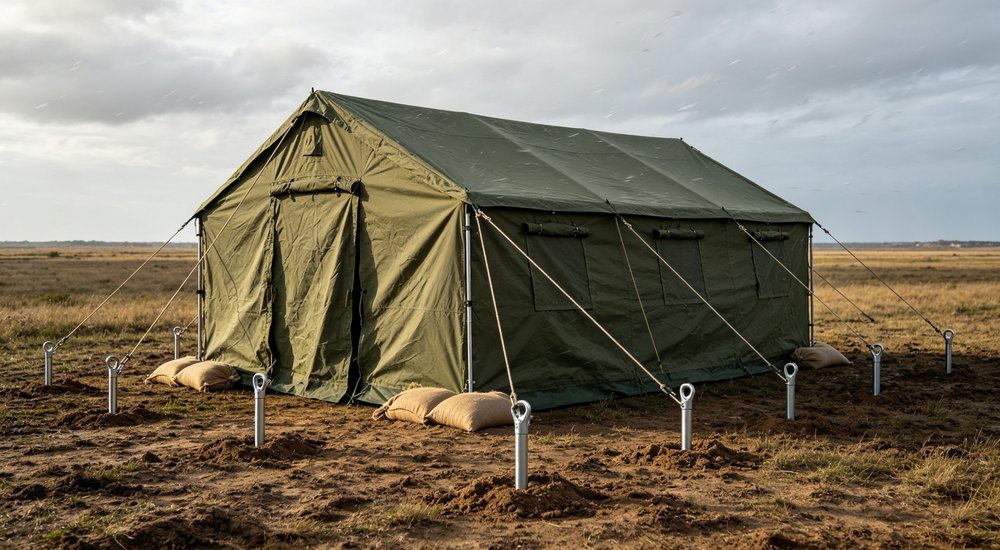
Request the wind load rating that applies to the exact frame size and anchoring configuration. Tear resistance and abrasion resistance matter at corners, door edges, and points where the cover contacts the frame. Reinforced patches at high-stress points extend the usable life in windy sites.
Submit the ground type, exposure, nearby shelter, and restrictions on stakes or ballast. Ask for the securing direction that belongs to the exact tent and site.
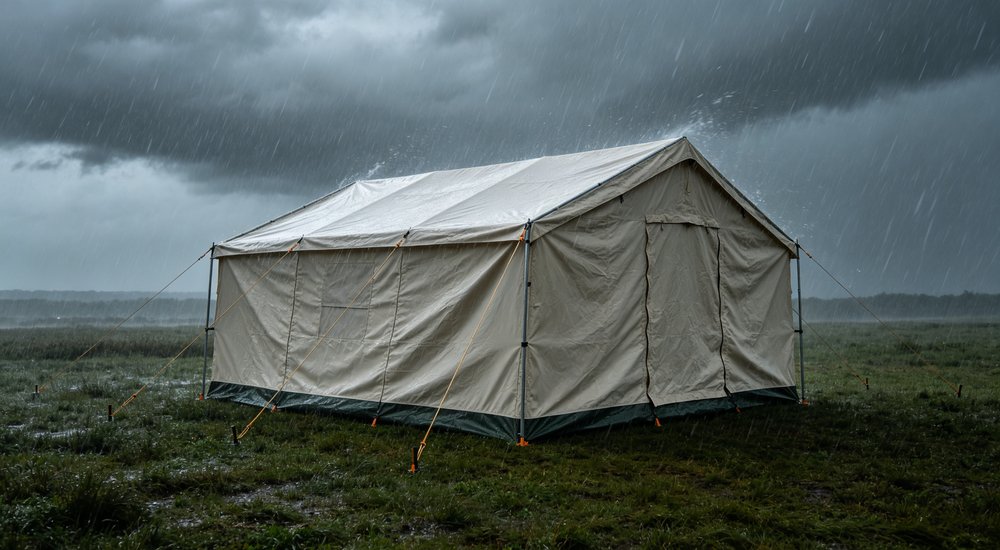
Do not transfer a wind statement from another size or anchoring method. Final wind and weather claims must follow the applicable specification, sample, or test documents.
Positioning can also reduce exposure. However, orientation cannot replace a compatible structure or securing method. Treat orientation as one part of the complete site plan.
Inspect securing points after the first weather event and at the interval required by the operating plan. Soft ground can loosen, while repeated cover movement can change line tension. Ask which components are included and which ground conditions they suit.
If stakes are restricted, obtain a model- and site-specific alternative. Do not assume floor weight, stored goods, or improvised objects provide the same function as the stated securing arrangement.
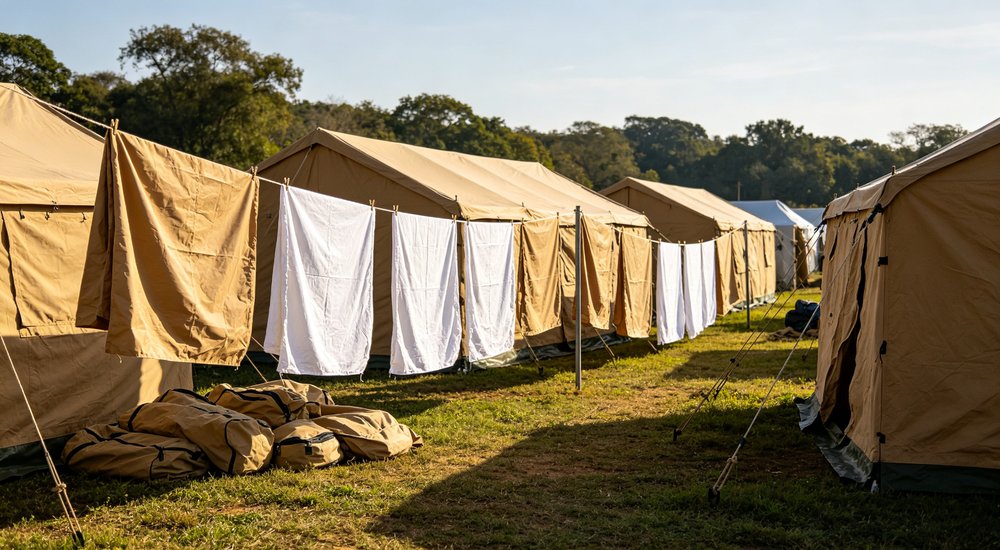
Rainy use creates wet folds, muddy lower edges, damp ropes, and moisture around repair points. Packing these items without drying can create odor, mildew, mold growth, coating damage, and an unusable set later. Mildew forms quickly when folded fabric remains damp for more than 24-48 hours, especially in hot-humid climates.
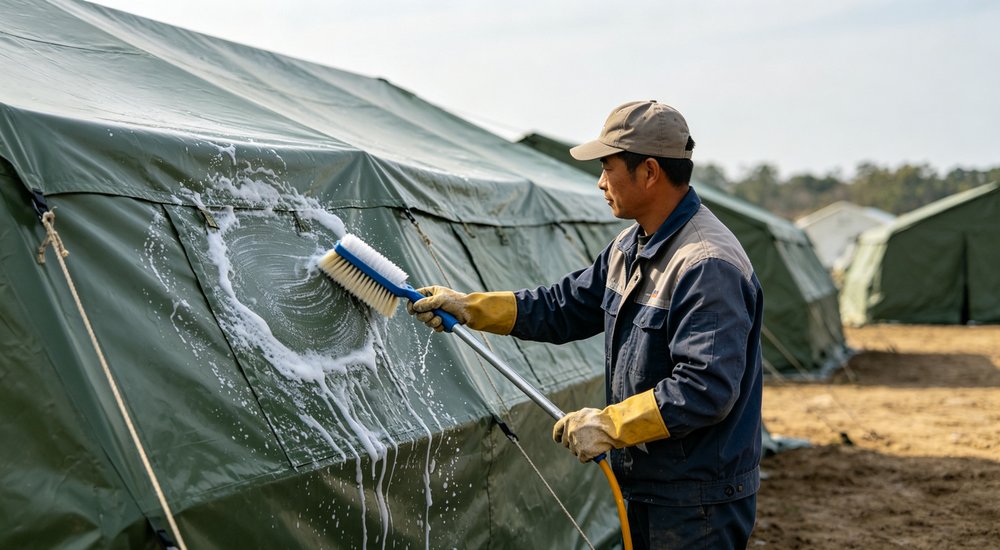
Examine packed weight and packing volume across configurations. A double-layer tent with liner and groundsheet may weigh significantly more and require more storage space than a single-layer design. Frequent relocation projects should balance weather protection against the wet handling weight and drying time required after each deployment.
Confirm which cleaners are permitted and how seams should be handled. Confirm whether covers, floors, liners, and ropes are packed together or separately.
Define a drying area and inspection order before the project begins. Mark tears, lifted tape, coating damage, and missing parts before storage. A repair kit must match the supplied material.
Frequent relocation may favor a balance between weather protection and manageable handling. Compare the complete wet-use cycle, not only the dry packed specification.
Estimate the wet handling task before choosing the configuration. Identify the largest cover section, lifting method, temporary dirty area, clean drying area, and time available before loading. A removable liner or floor may simplify separate cleaning but create more labeled parts.
Ask how sets remain matched after drying.
|
Frequency |
Check Items |
Action |
|
Daily |
Openings, pegs, guy lines |
Check openings close properly, pegs are secure, guy lines are taut |
|
Weekly |
Drainage, pooling, stains |
Clear roof and surrounding water, wipe visible stains, check drainage channels |
|
Monthly |
Seams, coating, mesh |
Inspect heat-sealed seams for cracks, coating for peeling, mesh screens for tears |
|
Quarterly |
Frame, connectors, mold |
Check frame connectors are tight, inspect interior for mildew, treat with approved cleaner if needed |
|
Annually/before storage |
Full inspection, repair, dry |
Full inspection of all components, repair minor damage, clean thoroughly and dry completely before storage |
The best configuration is one the available team can clean and restore without losing parts or repeatedly storing moisture.
Prepare location, season, daytime and night conditions, rain pattern, humidity, wind exposure, ground, occupancy, layout, use period, relocation, and cleaning resources.
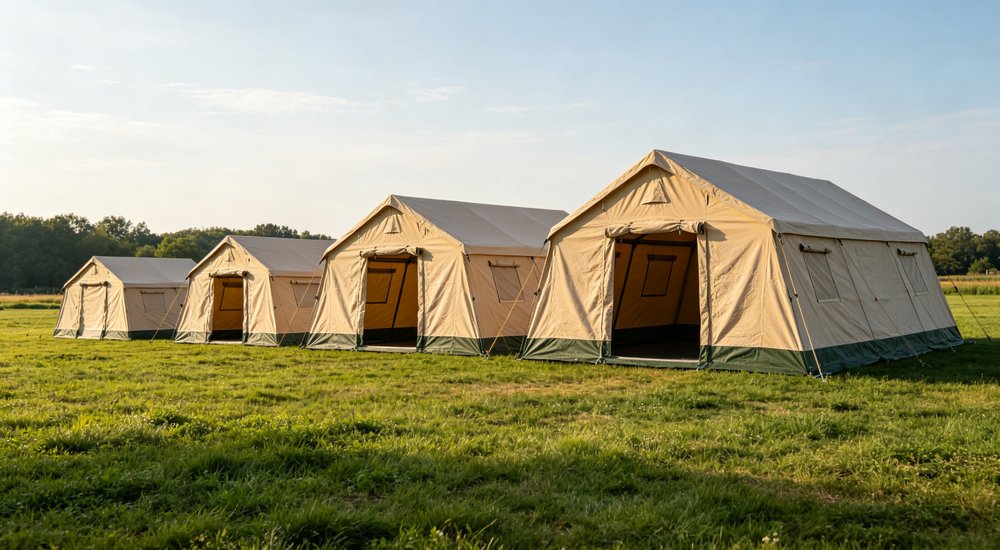
Request opening layout, mesh and flap details, outer cover and liner construction, seam method, lower-edge and floor arrangement, anchoring direction, cleaning, drying, and applicable documents.
Have the supplier explain the difference between any 2 offered directions. The explanation should describe the buyer benefit and trade-off, not only the material name or price.
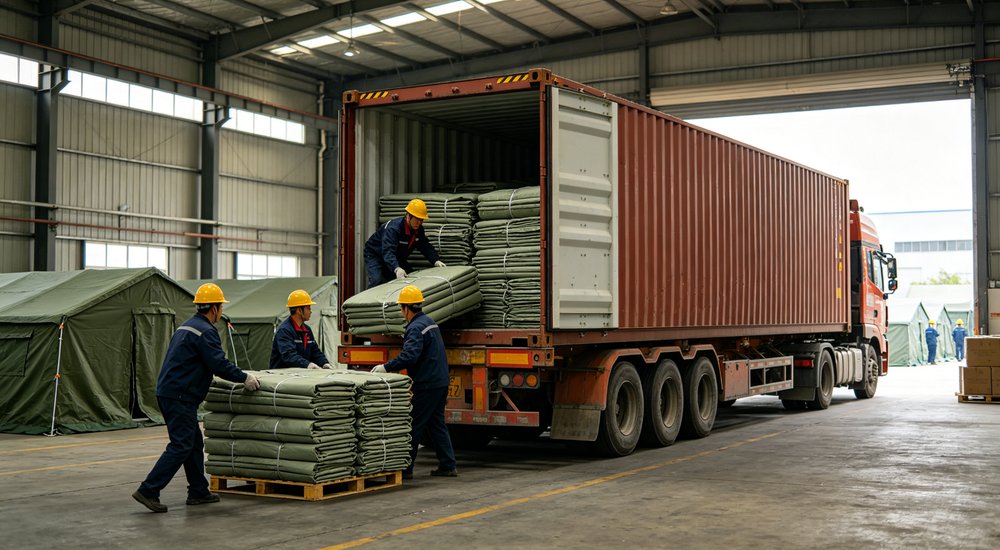
Questions to clarify during the inquiry: How does the quoted tent manage heat, rain entry, site water, internal moisture, and wet-use maintenance? Which exact model and supporting document applies to each performance statement? Ask for tent dimensions (typical sizes include 4m×6m for 10-12 persons, 5m×8m for 20-25 persons, and 6m×10m for 40-50 persons), setup time (typically 30-60 minutes with 2-4 trained workers), packed volume per set, and container loading quantity (20GP and 40HQ estimates vary by model and packing method). Also confirm minimum order quantity (MOQ), custom logo or OEM options, lead time for bulk orders, and whether the relief tent manufacturer can provide sample before mass production.
Assess supplier responses beside the same climate brief. One proposal may include protected vents and a liner, while another assumes doors remain open. One may include a floor, while another assumes prepared ground.
These are not equivalent scopes. Ask each supplier to identify inclusions, options, limits, and required site actions. Price comparison becomes useful only after the operating assumptions and supplied components describe the same result.

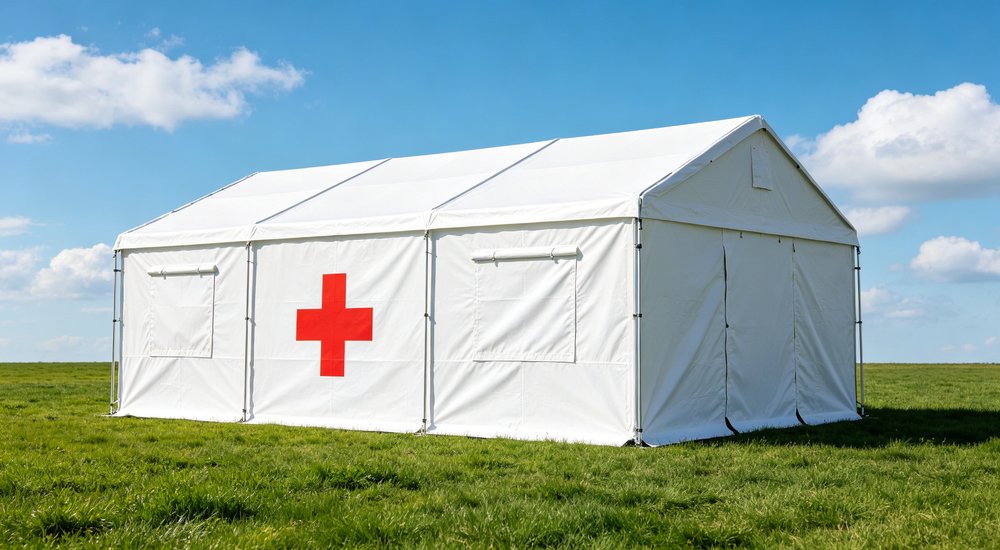
Red Cross emergency relief symbol - customizable logo option
Closing every opening during rain. This may reduce airflow and increase internal moisture. Confirm protected ventilation.
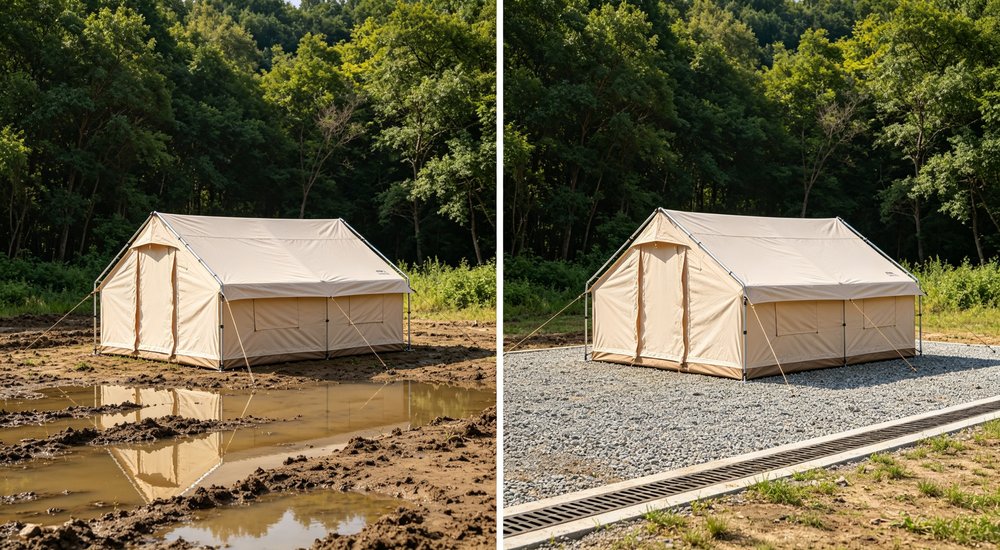
Choosing only by waterproof rating. Seams, openings, drainage, and condition still affect the result.
Ignoring the ground. A floor cannot correct a low or flooded site.
Forgetting wet packing. Cleaning and drying resources are part of the real product choice.
Before ordering, make sure the proposed tent answers all 3 tasks: heat, rain, and moisture. If one task has no clear response, the configuration is incomplete.
For example, a 200-person refugee camp deployment in a monsoon region often requires 8-10 family-sized frame tents with PVC coated covers, mesh windows with rain flaps, and separate groundsheets. The procurement team typically requests samples first, checks heat-sealed seams during a rain simulation, and confirms container loading quantity before placing a bulk order with the relief tent manufacturer. This real-world process shows why the 12-point checklist matters more than a single fabric weight number.
Use the proposed sample in the same reading order as this article. First confirm that openings can support the planned layout. Then inspect rain protection, lower edges, floor direction, and securing parts.
Finally, confirm how every wet component will be cleaned, dried, repaired, and packed.
Write the result in plain project language. State what works for the site, what does not fit, and what the buyer must prepare. This creates a decision that another purchasing colleague can understand without repeating the entire discussion.
It also prevents a later price revision from quietly changing the climate assumptions or supplied components. Keep the same wording in the quotation and sample notes.
Daytime use may need less direct sun and more airflow. After temperatures fall at night, occupants, wet clothing, and ground moisture can increase condensation on inner surfaces. The phrase hot and rainy does not explain these changes across one day. A single-wall tent may ventilate well during the day. But it can collect more condensation at night. A double-layer design with breathable inner liner can reduce direct contact with cold outer fabric. During the rainy season, daytime humidity may be high but temperatures are also warm, while nighttime cooling can cause rapid condensation if ventilation is reduced too early.
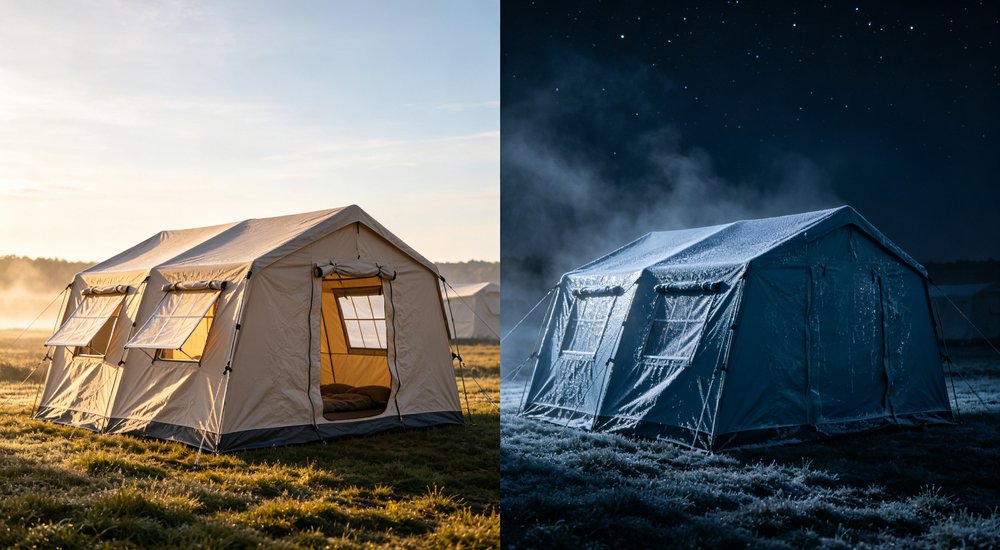
State the day and night occupancy, whether openings can remain in use, whether wet items stay inside, and how much privacy is needed after dark. The supplier should explain how openings, mesh mosquito netting, liners, and the outer cover work together for both daytime heat and night-time moisture. Mosquito net or insect mesh panels allow airflow while keeping insects out, but their density and protective flap affect both ventilation and rain protection.
If the daytime ventilation plan closes completely during rain, check airflow and moisture after closure. One configuration should address dry heat, active rain, and the humid period after rain rather than optimise only one condition. Roof pitch and eave height also affect how quickly hot air exits and how rain runs off without splashing onto lower walls.
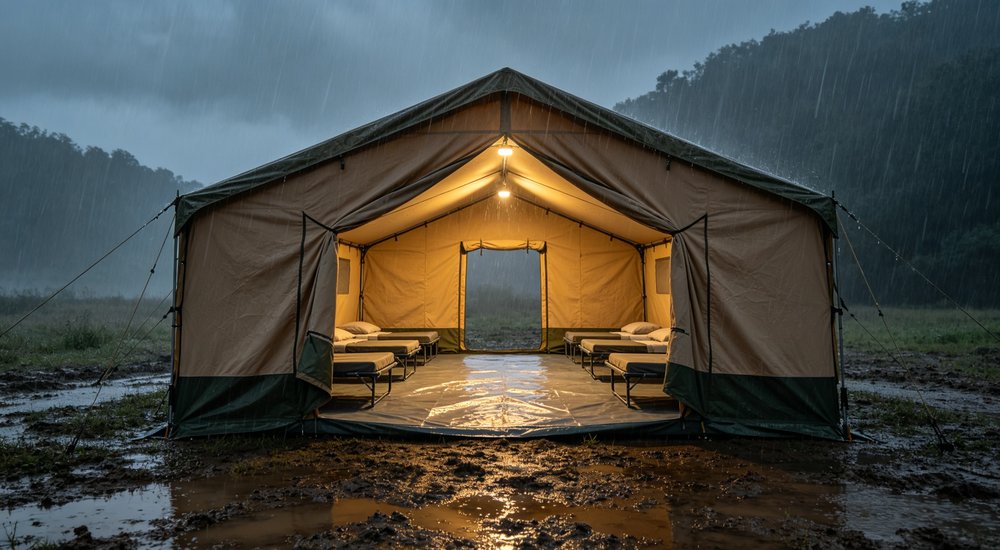
State the day and night occupancy, whether openings can remain in use, whether wet items stay inside, and how much privacy is needed after dark. The supplier should explain how openings, mesh, liners, and the outer cover work together.
If the daytime ventilation plan closes completely during rain, check airflow and moisture after closure. One configuration should address dry heat, active rain, and the humid period after rain rather than optimise only one condition.
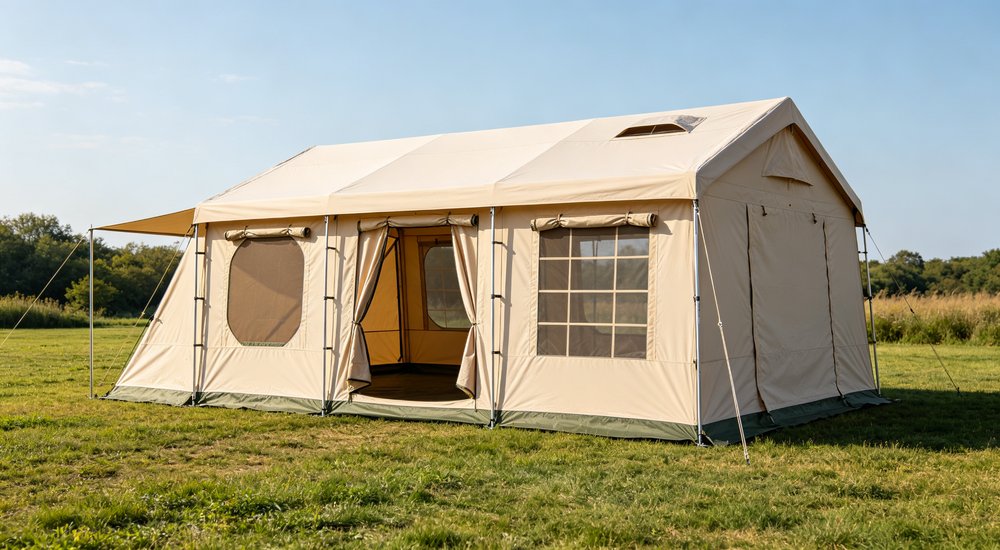
More openings are not automatically better in a rainy climate. A large windward opening may admit rain, a low vent may receive ground splash, and complete closure may reduce airflow. Each opening type has a different trade-off between airflow, rain protection, insect control, and privacy. Opening size directly affects airflow: larger doors and side windows provide more air exchange but also increase rain entry risk. The main entrance should be at least 1.2m wide for easy access, with a roll-up rain flap. The relationship between openings and ventilation volume should be specified at purchase. Aim for at least 0.5m² of adjustable ventilation opening per 10m² of floor area, including doors, windows, and roof vents. In hot humid climates this ratio should increase to 0.8m² or more. All openings must include mosquito netting that allows airflow while keeping insects out.
|
Opening Type |
Airflow Benefit |
Rain Risk |
Best Use |
|
Roll-up door with flap |
High when open |
Medium, needs overhang |
Main access, cross-ventilation |
|
Mesh window with rain flap |
Medium, insect-safe |
Low when flap closed |
Side ventilation, night use |
|
Roof vent / vent flap |
Medium, hot air exit |
Low if properly hooded |
Condensation control |
|
Eave gap / raised skirt |
Low-medium |
Medium in driving rain |
Passive airflow at base |
Mark the main exposure, beds, work areas, and entrance on the layout. Then decide which openings need mesh, shielding, adjustable closure, or exterior protection. Accommodation must also preserve privacy and night access. A rain fly or external shade layer can protect openings from direct rain while allowing some airflow. But it adds parts, weight, and setup time.
Mark the main exposure, beds, work areas, and entrance on the layout. Then decide which openings need mesh, shielding, adjustable closure, or exterior protection. Accommodation must also preserve privacy and night access.
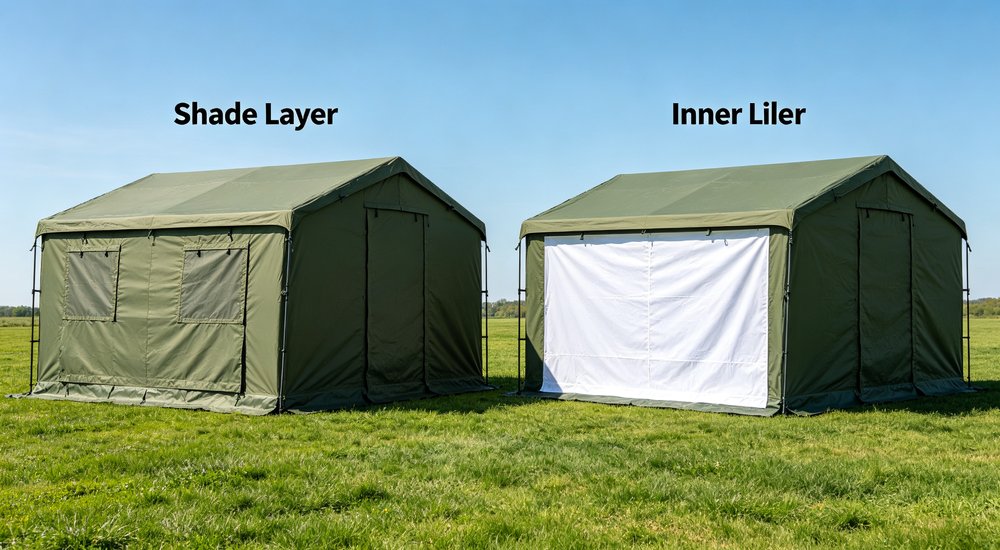
The supplier should show the position, opening direction, closure, and cover connection for each feature. A statement that the tent has windows or vents is not enough when buyers cannot see whether they remain usable during rain.
An extra shade layer, double cover, or liner may reduce direct heat and improve privacy. It can also keep occupants away from the inner surface of the outer cover. A double-layer design with a breathable inner liner can reduce condensation contact, while a single-layer tent is lighter and easier to dry but may feel hotter in direct sun. These options add parts, packing volume, assembly, cleaning, and drying work.
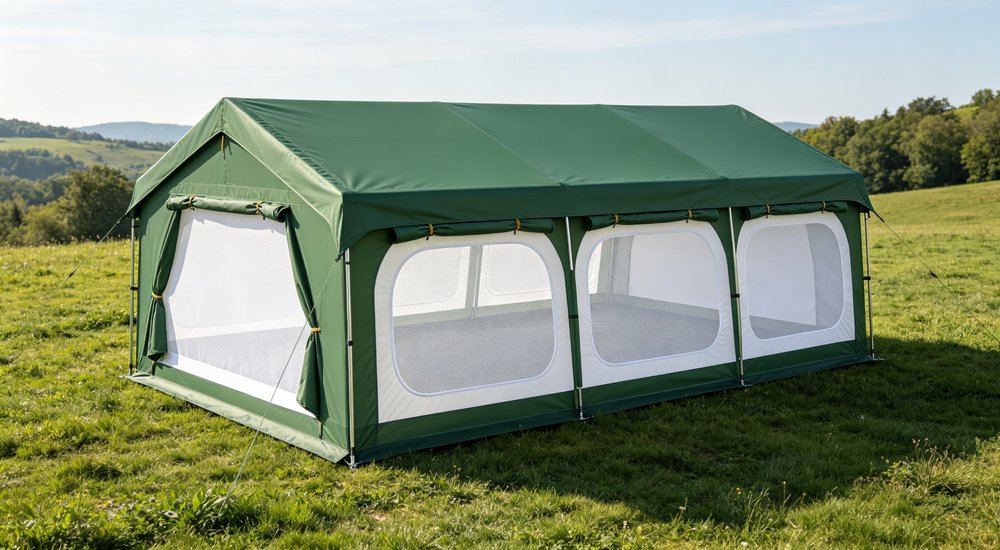
First define whether the project needs protection from direct sun, help with night condensation, privacy, or low-temperature support. Do not add every layer because more material sounds better. Each layer needs a material, connection, opening arrangement, and cleaning method. A rain fly or external shade layer can reduce solar heat on the main cover but must have proper air gap and attachment points to avoid trapping water or adding unsupported load.
A complex configuration can create more wet packing when the project has no drying space or trained crew. Compare the user benefit with the work required after rain. Also compare packed weight and packing volume, since multiple layers significantly increase the total shipment weight and storage space needed for each tent set.
First define whether the project needs protection from direct sun, help with night condensation, privacy, or low-temperature support. Do not add every layer because more material sounds better. Each layer needs a material, connection, opening arrangement, and cleaning method.
A complex configuration can create more wet packing when the project has no drying space or trained crew. Compare the user benefit with the work required after rain.
Water can enter even when the roof and walls show no obvious leakage. Runoff from higher ground, puddles at the door, low floor points, and repeated foot traffic can carry water inside. A groundsheet cannot replace site drainage. The entrance is the highest-traffic point and the most common path for water, mud, and moisture to enter the shelter.
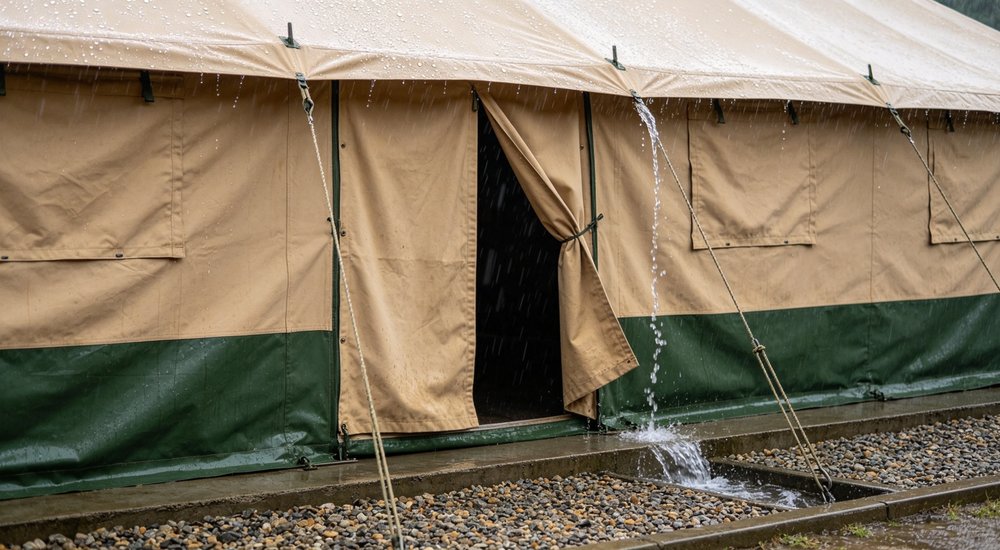
Show slope, drainage direction, entrance orientation, the approach route, and floor edges on one drawing. Do not point the entrance toward obvious runoff or use a floor to justify a low site. Eave height and roof overhang above the entrance reduce direct rain on people entering and exiting, while a raised entrance threshold or step can reduce water tracking inside.
During a sample check, open the door and inspect raised edges, trip points, and the path water may follow through the connection or underfoot. Change the site, entrance, or ground solution when the arrangement does not work. For refugee camp and IDP camp settings where tents remain in place for months, entrance wear and water management directly affect long-term habitability and maintenance cost.
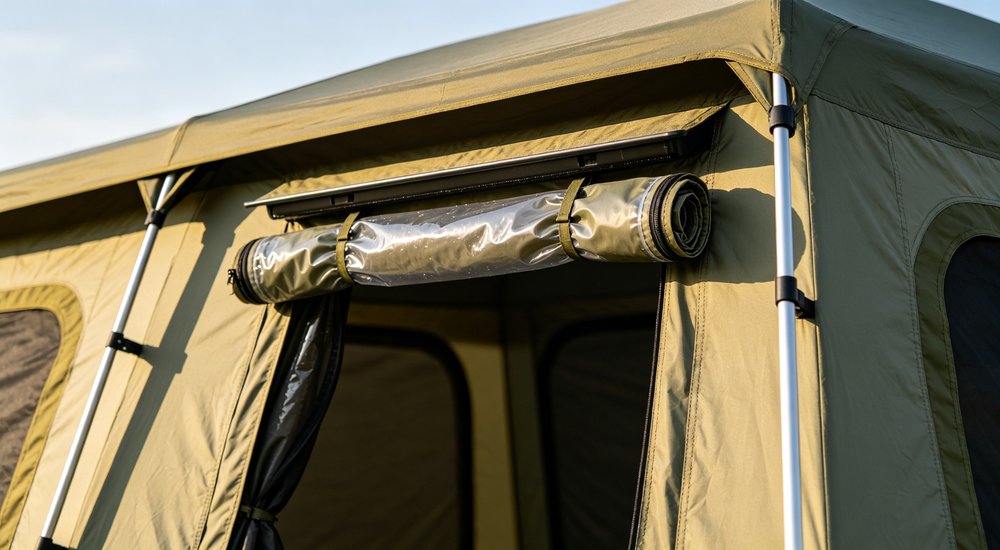
Show slope, drainage direction, entrance orientation, the approach route, and floor edges on one drawing. Do not point the entrance toward obvious runoff or use a floor to justify a low site.
During a sample check, open the door and inspect raised edges, trip points, and the path water may follow through the connection or underfoot. Change the site, entrance, or ground solution when the arrangement does not work.
A fully open tent viewed in a dry room cannot show how it works in hot and rainy conditions. Inspect airflow, light, and interior use with doors and panels open, partly closed, and fully closed. Use the following sample inspection checklist to evaluate the complete configuration rather than a flat fabric swatch.
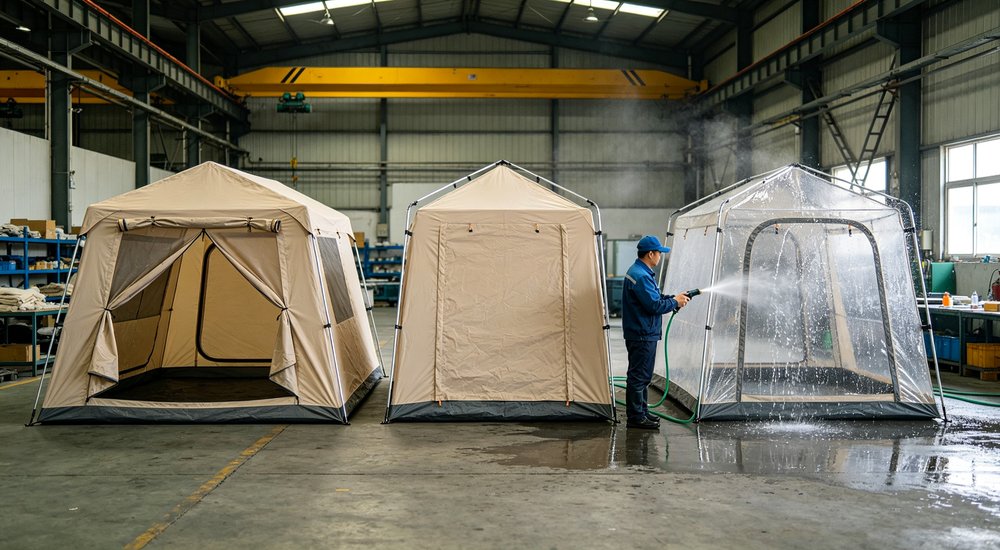
Sample Inspection Checklist:
Then inspect seams, corners, openings, skirts, and floor connections. After the permitted wetting, cleaning, and drying process, check whether the material folds normally, retains moisture, and returns to its packages. Tear resistance and abrasion at high-wear points should be evaluated against the expected deployment duration and relocation frequency.
The sample result must match the offered cover, openings, liner, floor, and securing configuration. Another tent or a flat fabric swatch cannot prove that the complete proposed shelter suits a hot and rainy environment. Confirm lead time, MOQ, customization options, and OEM availability before placing a bulk order. Also verify sample policy and quality control process, since these commercial terms affect whether the tested configuration can be reliably reproduced at scale.
Then inspect seams, corners, openings, skirts, and floor connections. After the permitted wetting, cleaning, and drying process, check whether the material folds normally, retains moisture, and returns to its packages.
The sample result must match the offered cover, openings, liner, floor, and securing configuration. Another tent or a flat fabric swatch cannot prove that the complete proposed shelter suits a hot and rainy environment.
Relief tent price range comparison: basic, standard, premium
Usable cross-ventilation is the first requirement, not simply a light color or one large window. Check the position and size of doors, windows, vents, mesh panels, liners, and partitions. Provide occupancy, bed layout, privacy, insect conditions, and daytime use.
Ask which openings can remain open safely and whether flaps protect them from changing weather. Shade direction and ground heat also affect comfort. No material should be presented as guaranteeing one indoor temperature without configuration-specific evidence and conditions.
Review the complete airflow path and operating routine for the exact model.
Check the full water path from roof to ground. Review the cover construction, roof joints, heat-sealed seam treatment, corners, door and window flaps, vents, lower edges, floor connection, and site drainage. Ask which waterproof statement applies to the fabric and which applies to the completed tent.
Provide the rainfall pattern, ground slope, standing-water history, and entrance direction. A high fabric value cannot correct damaged seams, open entrances, or a low site. Use an agreed sample check that follows the exact model and project requirement.
Yes. Waterproofing limits external water through the covered construction, while condensation comes from moisture inside and temperature differences. Occupants, wet clothing, damp bedding, and limited airflow can increase it.
Check protected vents, mesh openings, doors, liners, occupancy, and the ventilation routine used during rain. A liner may improve separation from the outer cover, but it also needs drying and cleaning. A good practice is to request a complete moisture direction instead of assuming that either a waterproof or breathable material solves every hot-humid condition.
No. More windows can improve airflow only when their size, height, position, and opening direction create a usable path. They must also support privacy, insect control, rain protection, and the interior layout.
A bed, divider, or stored item can block the expected airflow. Ask for an opening drawing and mark the planned interior arrangement. Confirm which windows have mesh and protective flaps.
Select the configuration that balances airflow with rain control rather than counting windows alone. Test the opening path after beds and partitions are placed.
Not by itself. A suitable floor can separate the interior from limited surface moisture, but it cannot correct low ground, rising water, blocked runoff, or entrance backflow. Provide the slope, soil, low points, previous standing water, and expected rain.
Ask how the floor connects to the cover and how entrances and lower edges are treated. Complete site drainage before relying on floor construction. For accommodation, also consider bedding height, cleaning, and cold or damp contact with the ground. Mark low points and expected water routes before placement.
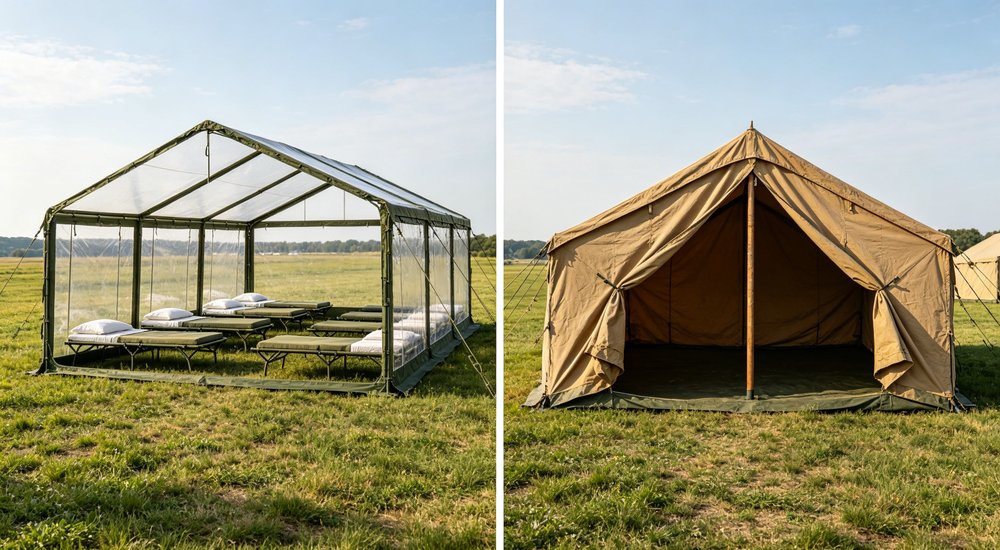
Frame tent vs pole tent comparison
Orientation should support airflow, reduce direct solar exposure where possible, and keep entrances away from known runoff. It should also consider wind-driven rain and the compatible securing arrangement. Note afternoon sun, prevailing wind, slope, nearby structures, access routes, and drainage.
Ask how the selected openings work in that position. Orientation can improve a suitable configuration, but it cannot replace adequate seams, protected openings, anchoring, or site preparation. Confirm the final arrangement against the actual location rather than using one universal direction.
A liner can be useful when it supports moisture separation, privacy, or contact comfort, but it is not required for every project. It can also restrict airflow if openings do not align. Buyers should compare climate, occupancy, ventilation, cleaning, drying, installation, packed volume, and replacement.
Ask how the liner connects and whether it blocks vents or windows. Confirm whether it is included or optional. Choose it for a defined operating benefit rather than treating an extra layer as automatic proof of better performance.
Clean, dry, inspect, and repair them before long storage. Open the cover fully so folds, seams, corners, lower edges, and old repair points can be observed. Dry ropes, floors, liners, and covers according to their material instructions.
Mark damage and keep each part with the matching model. If immediate wet packing is unavoidable during movement, arrange reopening and drying as soon as practical. Ask the supplier for compatible cleaning and repair methods.
A dry-looking outer surface does not prove that folded seams or inner layers are dry.
Send the location, season, daytime and night conditions, rainfall pattern, humidity, wind exposure, ground, shade, occupancy, use period, and relocation frequency. Add the interior layout, privacy, insect control, cleaning, drying, and site restrictions. The supplier should be asked to return the opening arrangement, cover and liner direction, seam treatment, lower edges, floor, securing method, and applicable documents.
This information produces a more useful comparison than requesting a general tropical or waterproof tent without defining the actual operating conditions. Require each alternative to identify changed openings, layers, floor, securing, and packing.
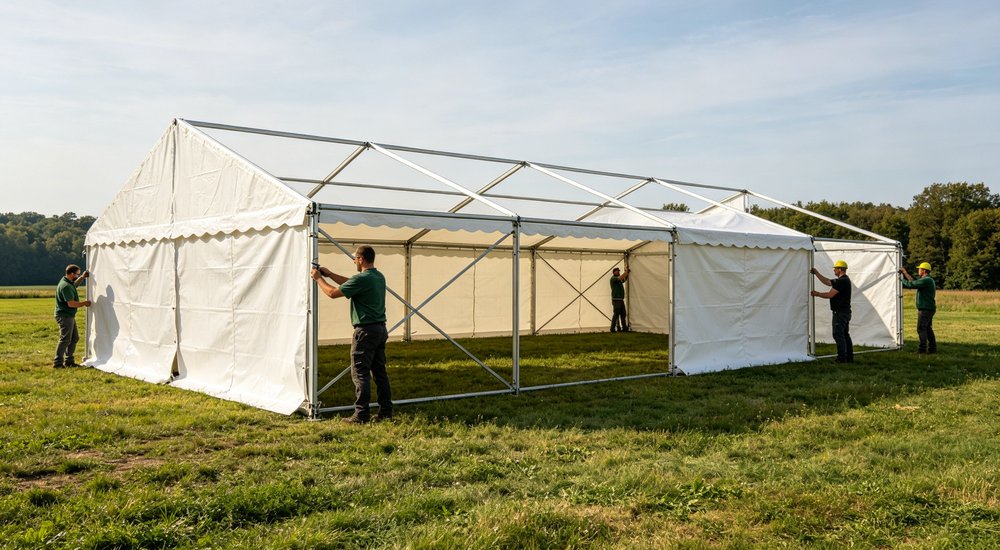
Relief tent setup process: 2-4 workers, 30-60 minutes
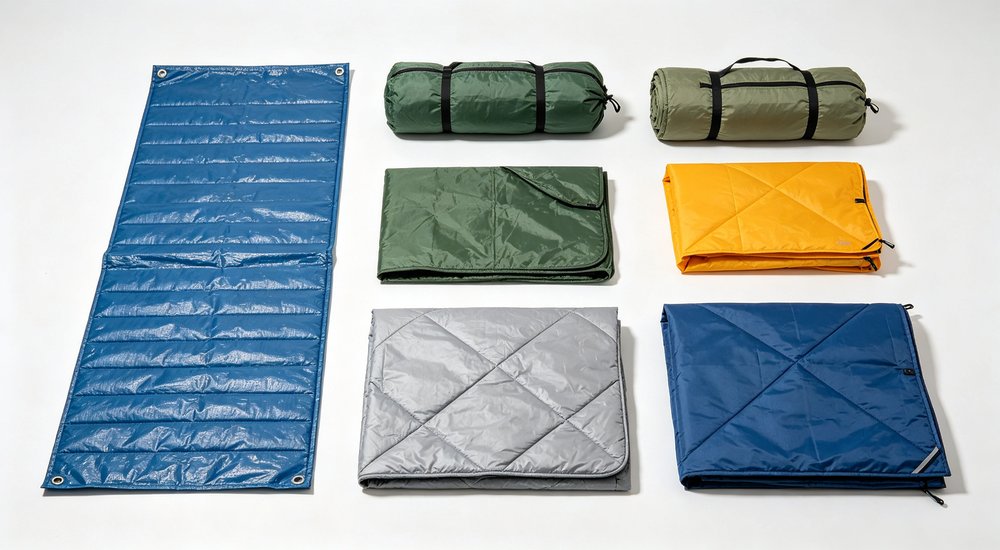
No single material is universally best. PVC-coated polyester offers good waterproofing and UV resistance but can feel hot in direct sun and requires heat-sealed seams. PE woven tarpaulin is lighter and more affordable but may have lower tear resistance and shorter UV life. Polyester Oxford with breathable coating can improve comfort but needs taped seams for rain. Cotton canvas breathes well but is heavy, slow to dry, and prone to mildew in hot-humid climates. The best choice depends on climate, occupancy, relocation frequency, cleaning resources, and required certification.
Ask the supplier to explain the trade-off for the exact project conditions rather than selecting from a material name alone. A frame tent with PVC-coated outer cover, mesh windows with rain flaps, and a breathable inner liner often balances heat and rain for stationary disaster relief use. A lighter PE design may suit short-term emergency response where rapid deployment and low cost are priorities.
Service life depends on material quality, climate, UV exposure, wind, occupancy, relocation frequency, cleaning, and maintenance. A well-maintained PVC-coated polyester frame tent in moderate climate may last 3-5 years or more for stationary use. In strong UV, high wind, or frequent relocation, the same tent may show coating degradation, seam wear, or fabric fading within 1-2 years. PE tarpaulin tents generally have shorter life, often 6-18 months in continuous outdoor use.
Flame retardant treatment, UV resistant coating, reinforced corners, heat-sealed seams, and proper drying before storage all extend usable life. Buyers should request the expected service life for the exact configuration and climate, and plan inspection intervals, spare repair kits, and replacement covers accordingly. A tent that remains usable longer reduces total cost of ownership even if the initial purchase price is higher.
Relief tent pricing varies widely by material, size, features, quantity, and supplier. PE woven tarpaulin tents for short-term emergency use generally start at the lowest price point, while PVC coated polyester frame tents with heat-sealed seams, mesh windows, and integrated floors cost more. Larger tents for 40-50 persons cost more than family-sized 10-person units, but the per-person cost may be lower. Custom logo printing, flame retardant certification, extra liners, and reinforced corners all add to the unit price.
Bulk order pricing from a wholesale relief tent supplier is typically significantly lower per unit than small quantity purchases. Minimum order quantity (MOQ) varies by manufacturer and model. Request a detailed quotation that lists every included component, optional items, packaging method, and lead time, rather than comparing only a single total price. Price comparison is meaningful only when all quotations cover the same configuration and scope.
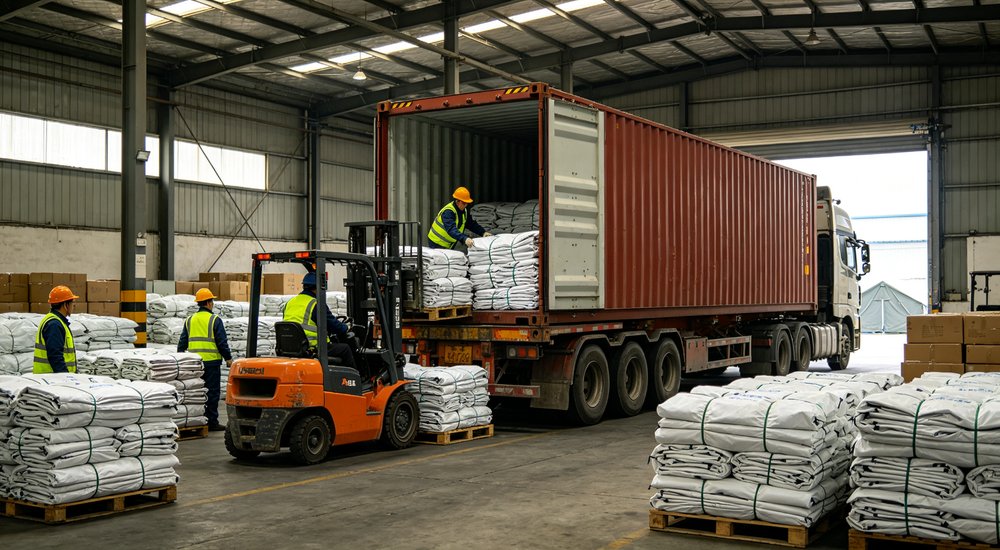
Capacity depends on tent dimensions, whether beds or mattresses are used, whether personal storage space is included, and local shelter standards. Common frame relief tent sizes include approximately 4m×6m for 10-12 persons, 5m×8m for 20-25 persons, and 6m×10m for 40-50 persons. These are typical estimates, and actual capacity should be confirmed with the supplier for the exact model.
Family-sized tents often provide more privacy per household, while larger communal tents may be used for medical stations, food distribution, storage, or community spaces. The buyer should specify whether the tent is for sleeping, medical use, storage, or multi-purpose, since the required floor area per person differs by function. Always confirm interior dimensions rather than relying only on the stated person capacity.
Frame tents use a rigid internal frame structure that supports the cover without center poles, creating unobstructed interior floor space. Pole tents rely on center poles and guy lines for support, which reduce usable interior space and can interfere with bed placement, medical equipment, or movement. Frame tents generally offer better wind stability when properly anchored, while pole tents are often lighter, faster to set up, and lower in cost.
For disaster relief and refugee camp use, frame tents are generally preferred for longer-term accommodation because the clear interior allows proper bed layout, ventilation paths, and privacy partitions. Pole tents may suit short-term emergency response where rapid deployment and low cost are priorities. The choice should match the expected deployment duration, site conditions, interior layout, and available setup crew.
Setup time depends on tent size, frame type, crew experience, weather conditions, and whether tools are required. A typical family-sized frame relief tent can be set up by 2-4 trained workers in approximately 30-60 minutes. Larger communal tents may require 4-6 workers and 1-2 hours. First-time setup without training generally takes longer, so supplier training or setup videos are valuable for field teams.
Pole tents are generally faster to erect than frame tents of similar size, but they require more ground space for guy lines and may need more frequent re-tensioning. The buyer should ask the relief tent supplier for setup instructions, required tools, estimated crew size, and whether on-site training or video guidance is included. Planning setup time is especially important for emergency response projects where shelter must be deployed quickly.
Yes, many relief tent manufacturers offer custom logo printing, organization branding, or identification markings on the cover, carry bag, or label. Customization options may include screen printing, heat transfer, woven labels, or attached identification patches. The available methods depend on the cover material and the supplier production process. Buyers should provide the logo file, specify placement, and confirm whether the printing affects waterproofing or flame retardant performance.
Custom logo or OEM orders typically require a minimum order quantity (MOQ) that may be higher than standard unbranded tents, and lead time may be longer. Sample approval before mass production is strongly recommended, especially when the logo must match organization branding guidelines. For government tenders or NGO projects, confirm whether branding is required, permitted, or prohibited by the project specifications before ordering.
Minimum order quantity (MOQ) varies by relief tent manufacturer, model, material, and whether customization is required. Standard unbranded models may have lower MOQ, while custom logo, specific colors, flame retardant certification, or non-standard dimensions may require higher minimum quantities. Bulk order pricing from wholesale relief tent suppliers is typically structured in quantity tiers, so larger orders receive lower per-unit pricing.
Buyers should ask the supplier to state the MOQ for the exact configuration, including any custom requirements, and to confirm lead time for both sample and bulk production. For tender projects, confirm whether the required quantity meets the supplier MOQ and whether partial shipments are possible. Always request a written quotation that lists MOQ, unit price by quantity tier, included components, packaging, and delivery terms.
It can when the exact configuration balances protected airflow, rain control, drainage, securing, and moisture management for the stated site. However, one design is not automatically suitable for every hot and rainy project. Check whether vents and windows remain usable during rain, how seams and openings are treated, and how wet parts are dried.
Provide occupancy, climate, ground, operating period, and relocation. Ask the supplier to explain any limits and bind performance statements to the quoted model, sample, or supporting documents.
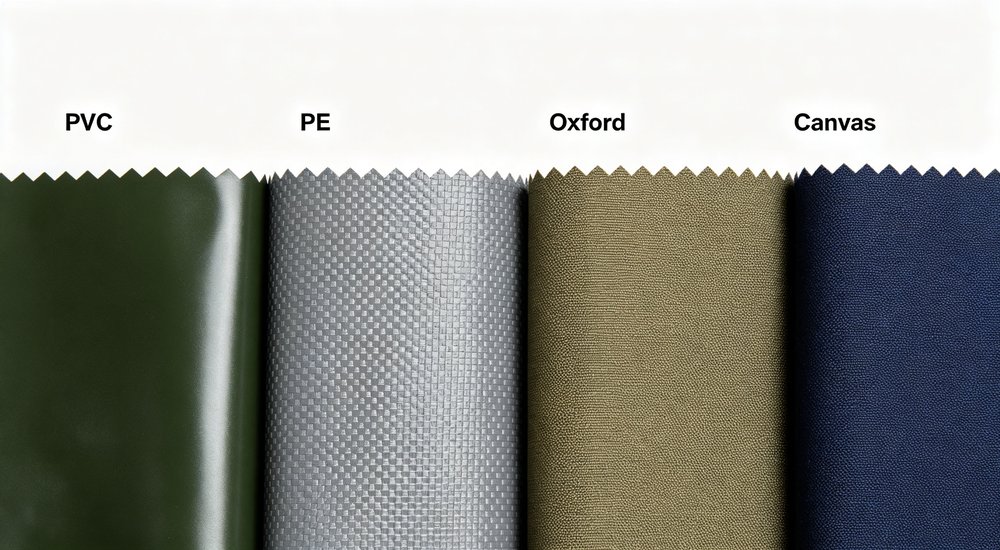
Four tent fabric materials: PVC, PE, Oxford, Canvas
Choosing the right relief tent for hot or rainy conditions is one part of a complete emergency shelter solution. Buyers often need matching components that work together under the same climate and site conditions.
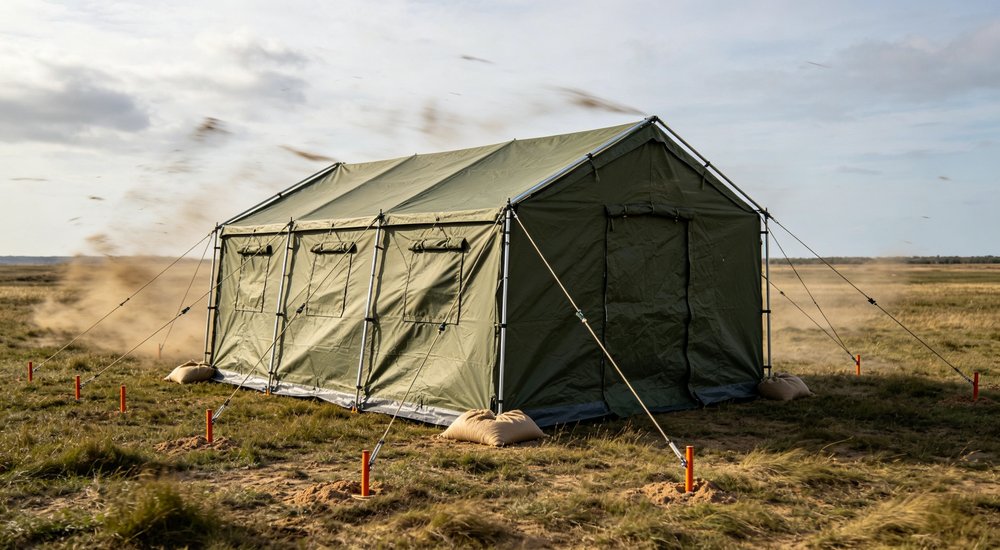
Relief tent wind resistance test
For humanitarian procurement, request a combined quotation when the project requires the tent structure, floor material, and bedding together. This helps the supplier confirm weight, packing volume, ventilation, and compatibility across all items. For institutional bedding options including hospital, school, military, and refugee camp bedding sets, see our institutional bedding collection.
✅ Sourcing rapid disaster relief tents? The 12m² Standard Relief Frame Tent: Compact Emergency Shelter for Fast Deployment packs full emergency shelter tents performance into a quick-to-erect 12m² footprint. As an established **frame tent manufacturer and frame tent supplier stocking ready bulk emergency tents, it is the standard pick for fast-response relief teams. Click for full product details.
|
|
|
||
|
|
Freundliche Links :
Urheberrechte © © Custom Disaster - Relief Bedding: Tents, Sleeping Bags, Blankets Alle Rechte vorbehalten
das professionelle Team zum Service !